🎉 Up to 70% Off Selected ItemsShop Sale
HomeStore
242253002 Refrigerator Water Inlet Valve for Frigidaire Electrolux Kenmore Crosley Refrigerators
242253002 Refrigerator Water Inlet Valve for Frigidaire Electrolux Kenmore Crosley Refrigerators
242253002 Refrigerator Water Inlet Valve
Key Features
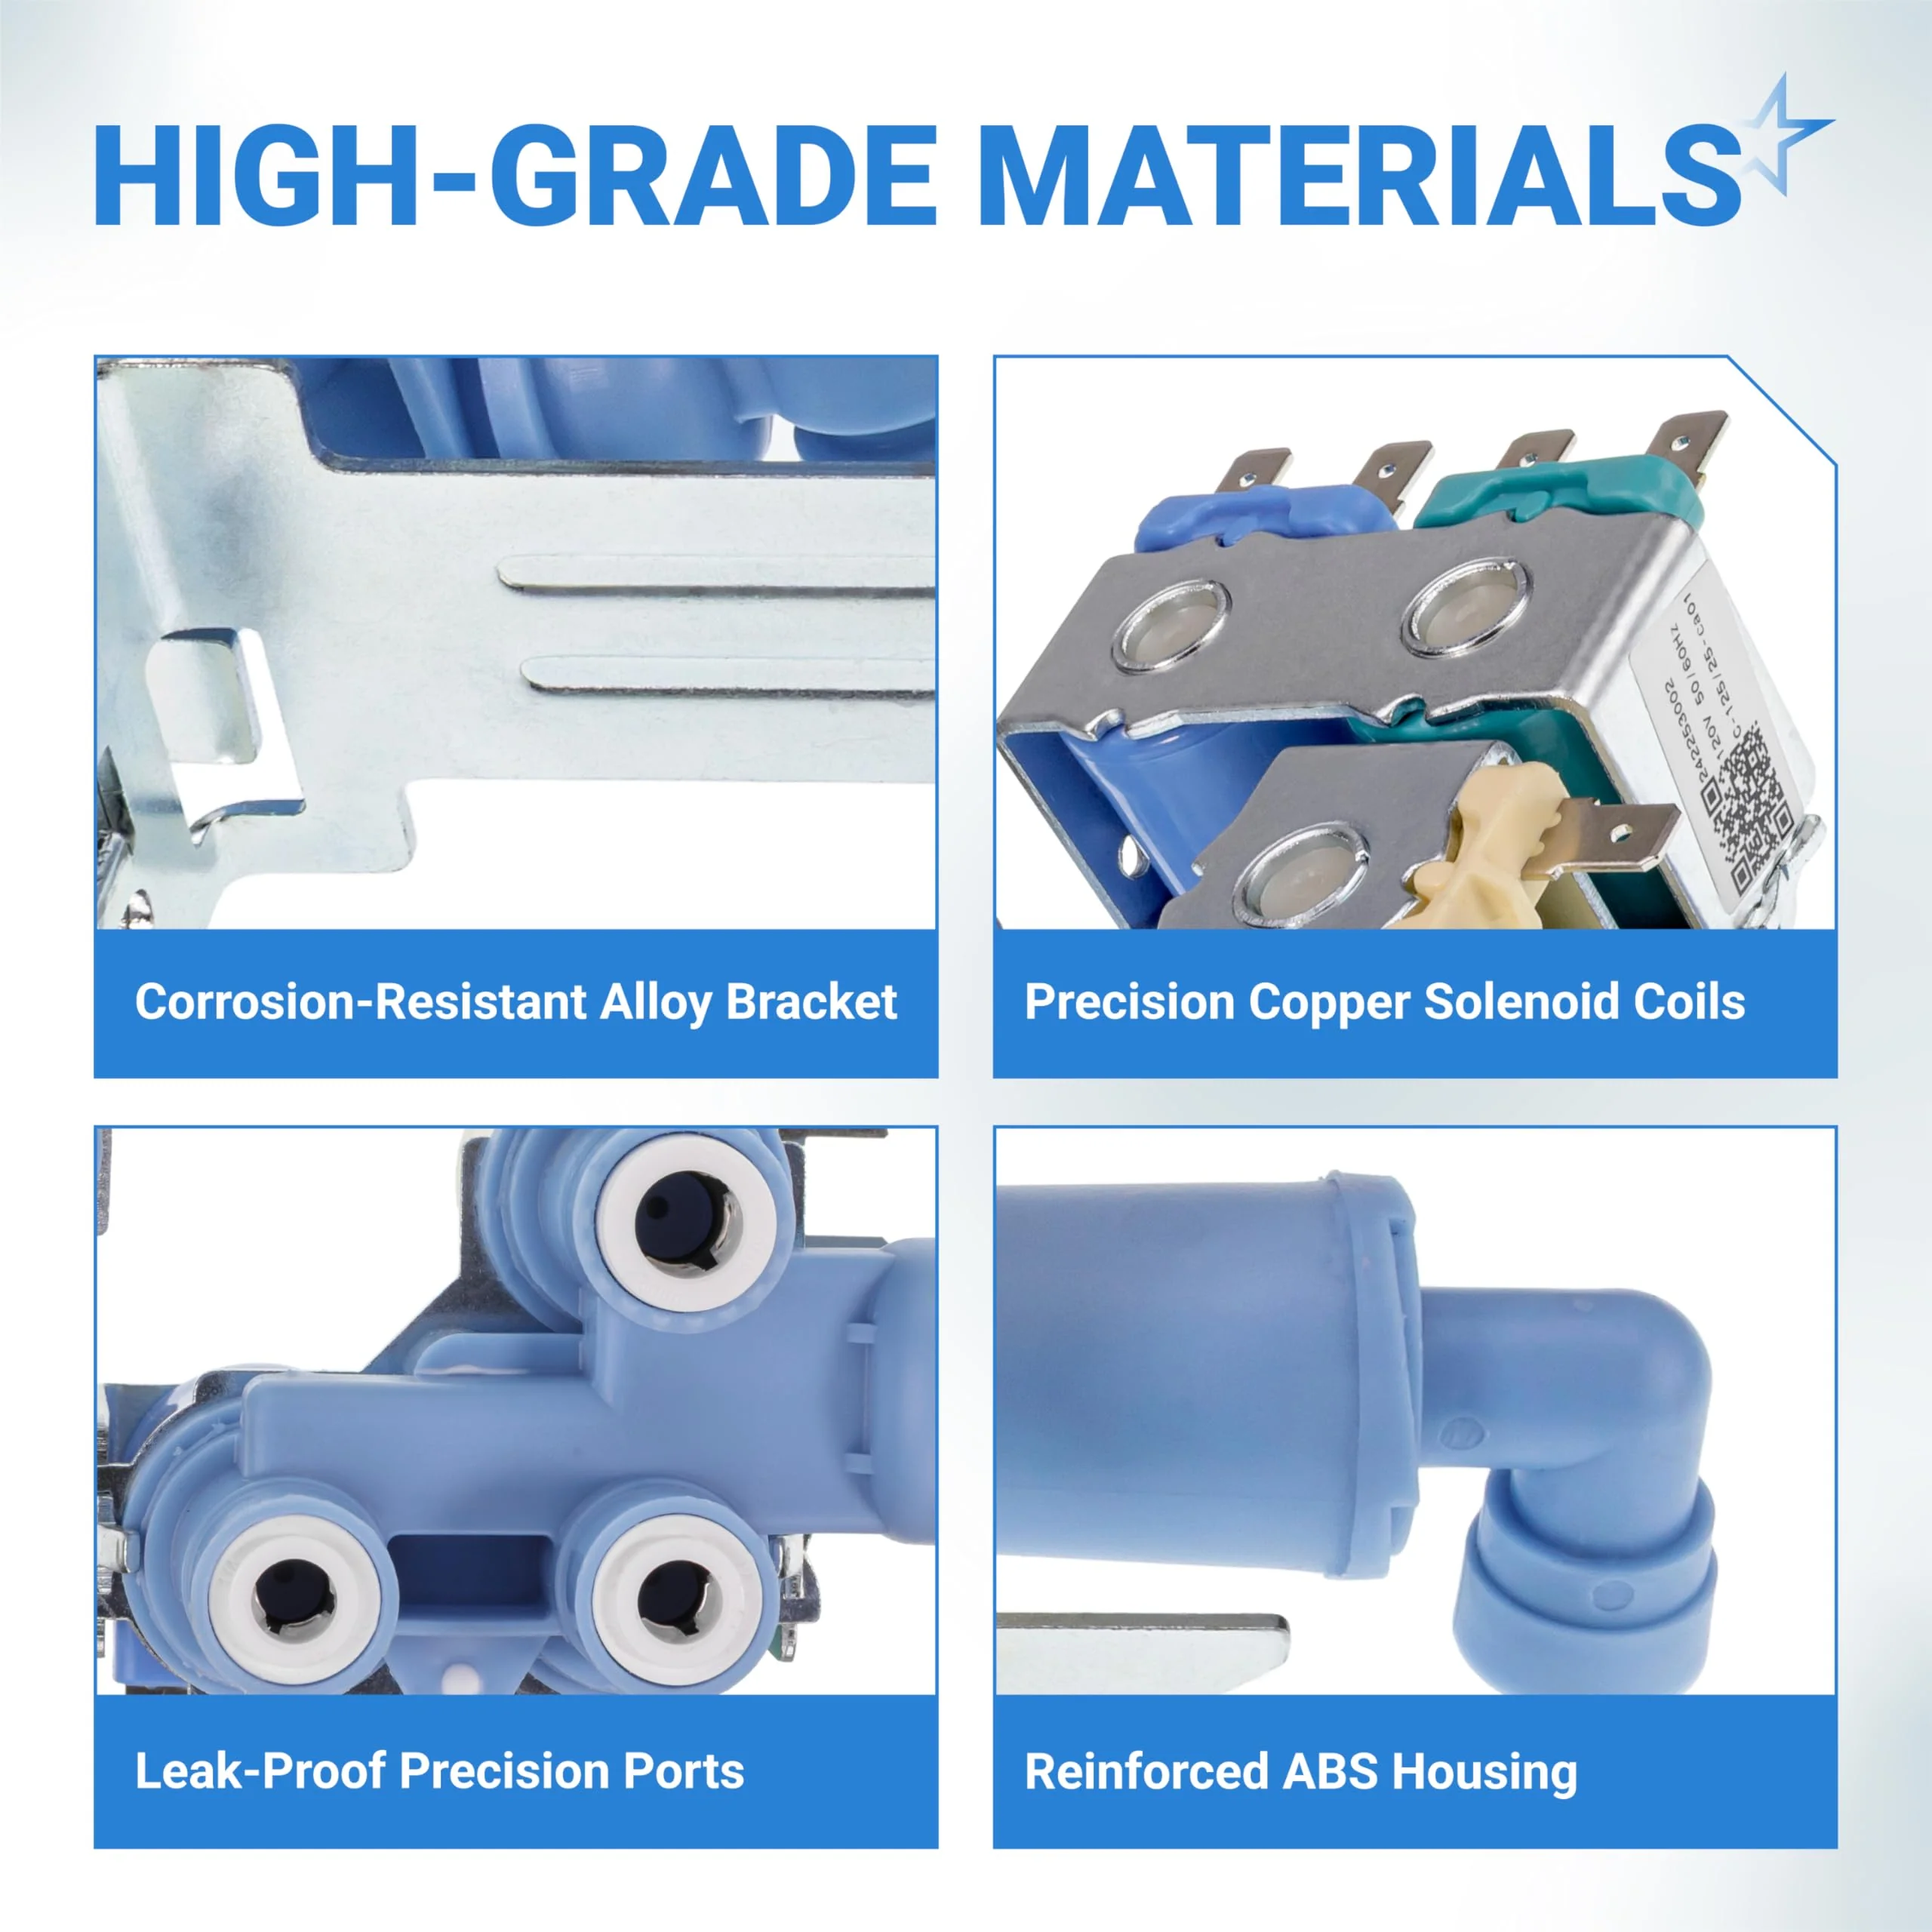
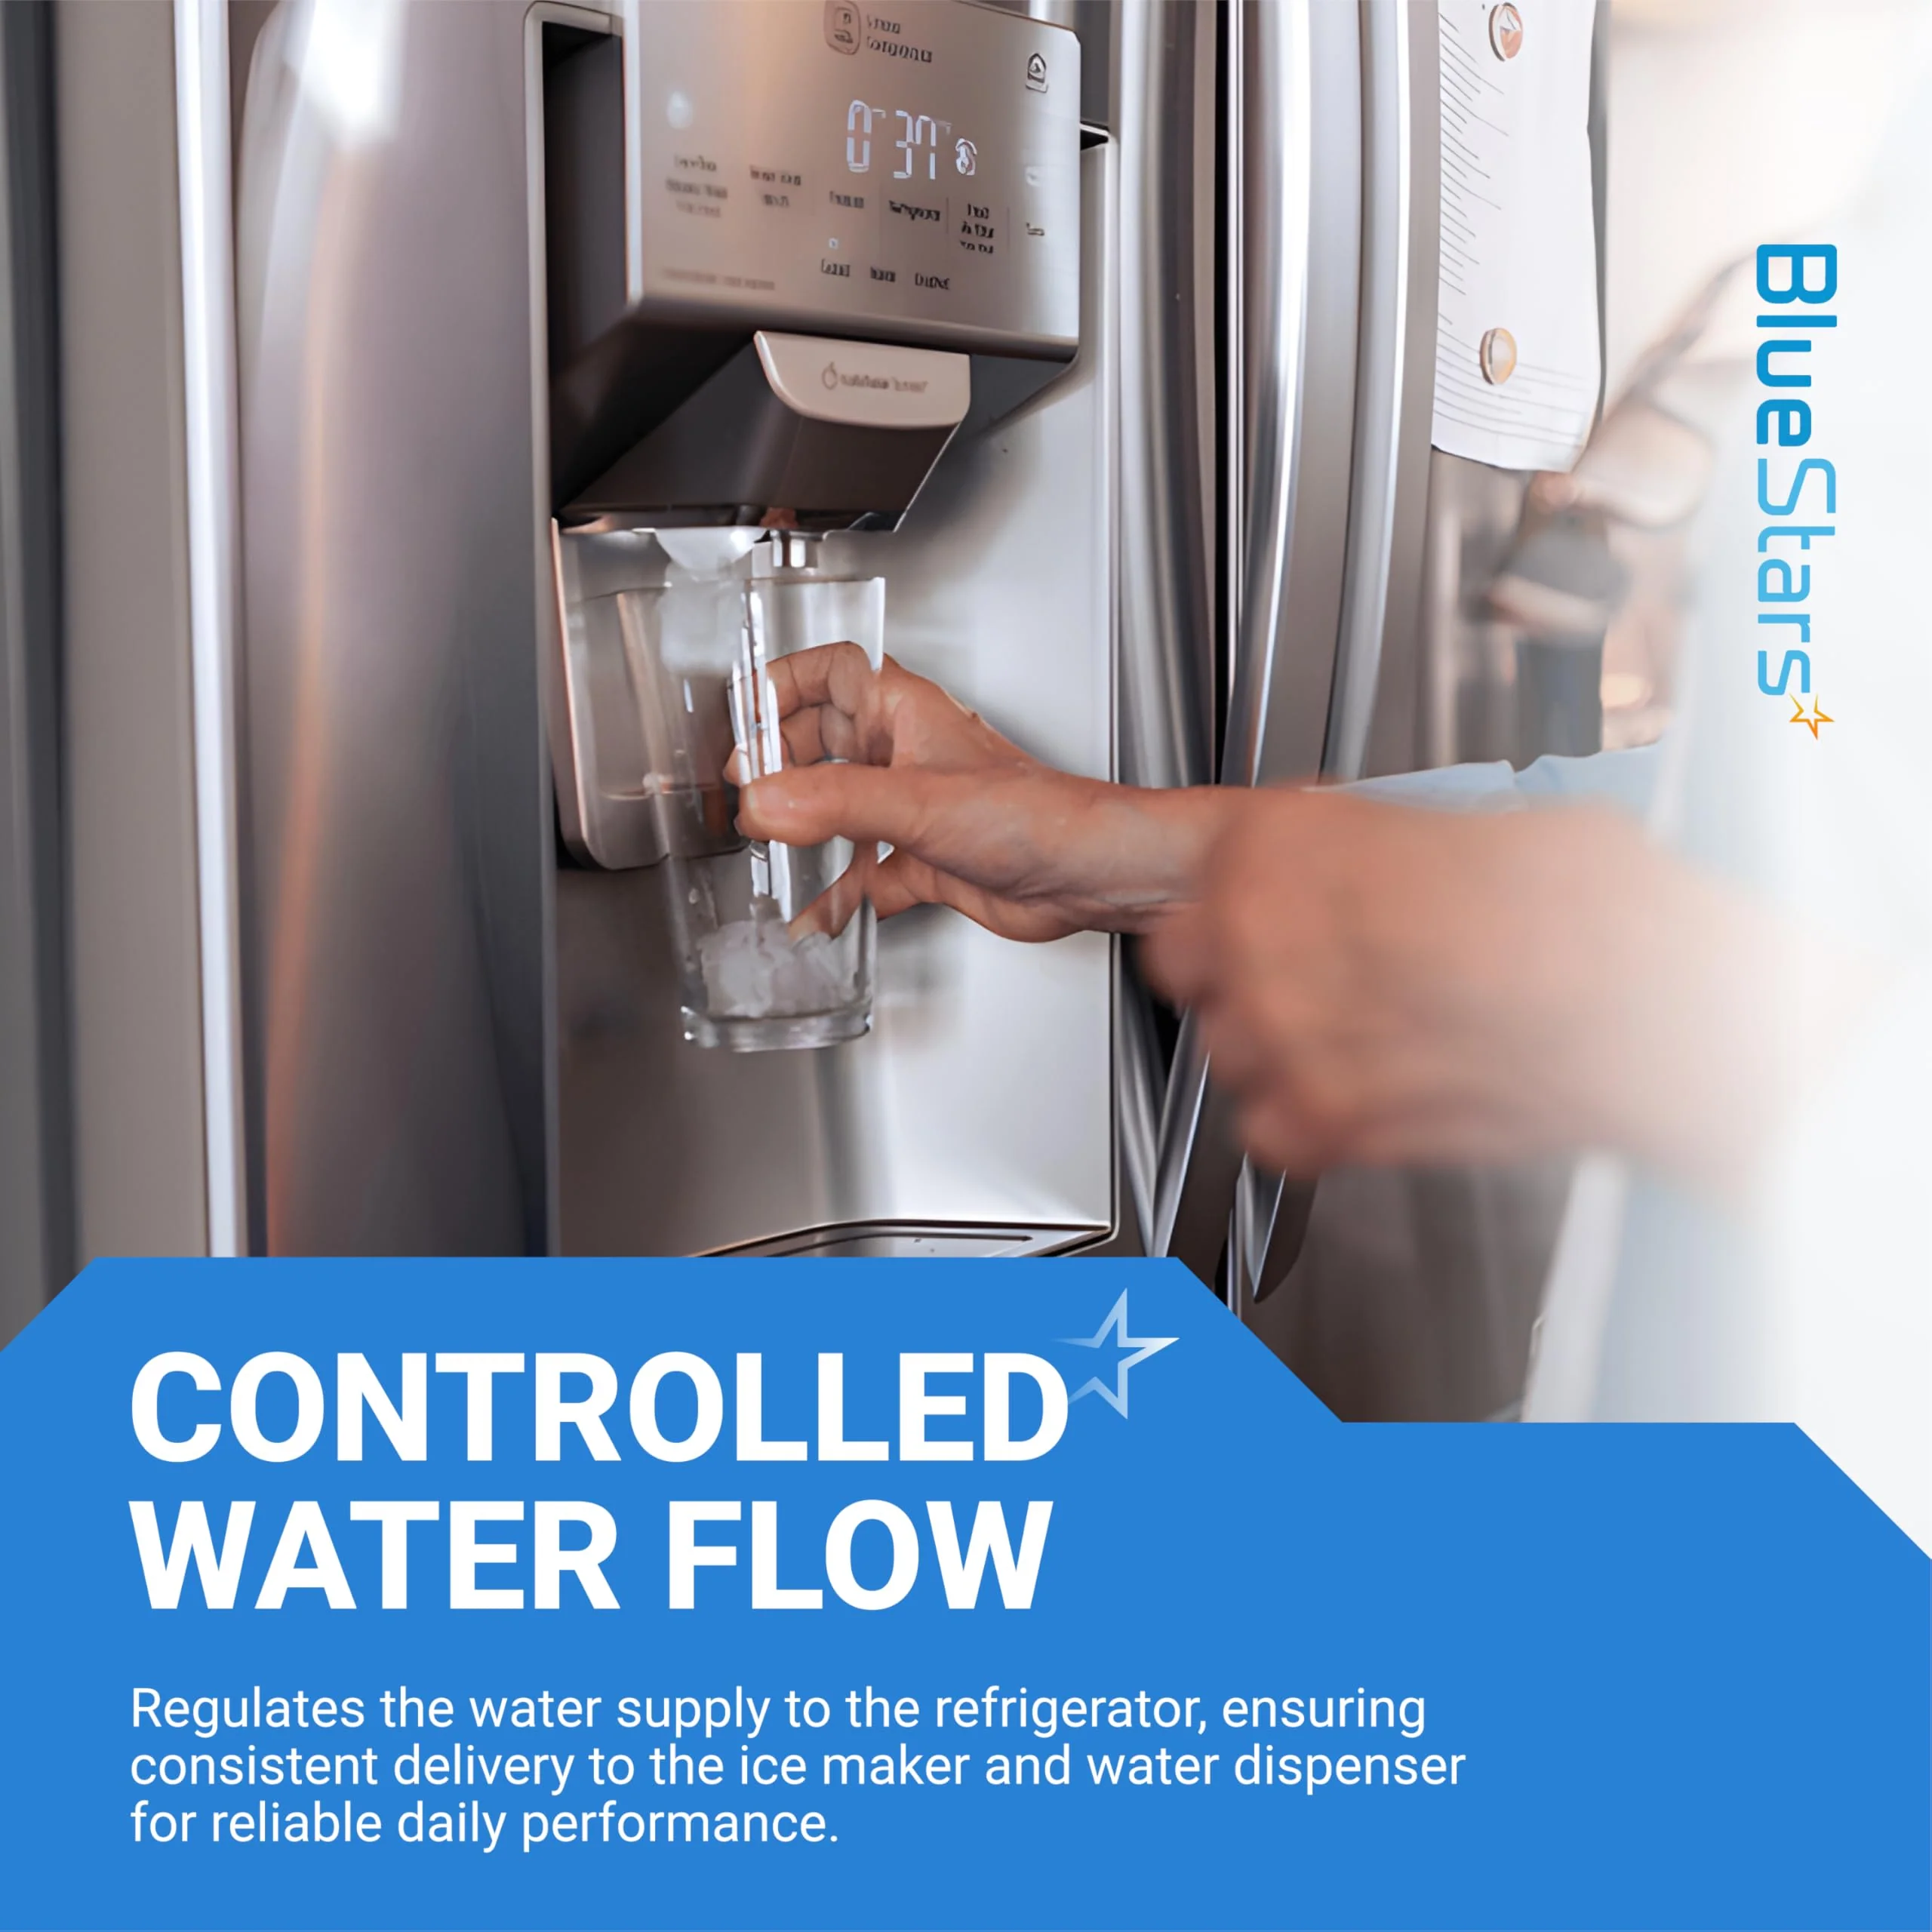
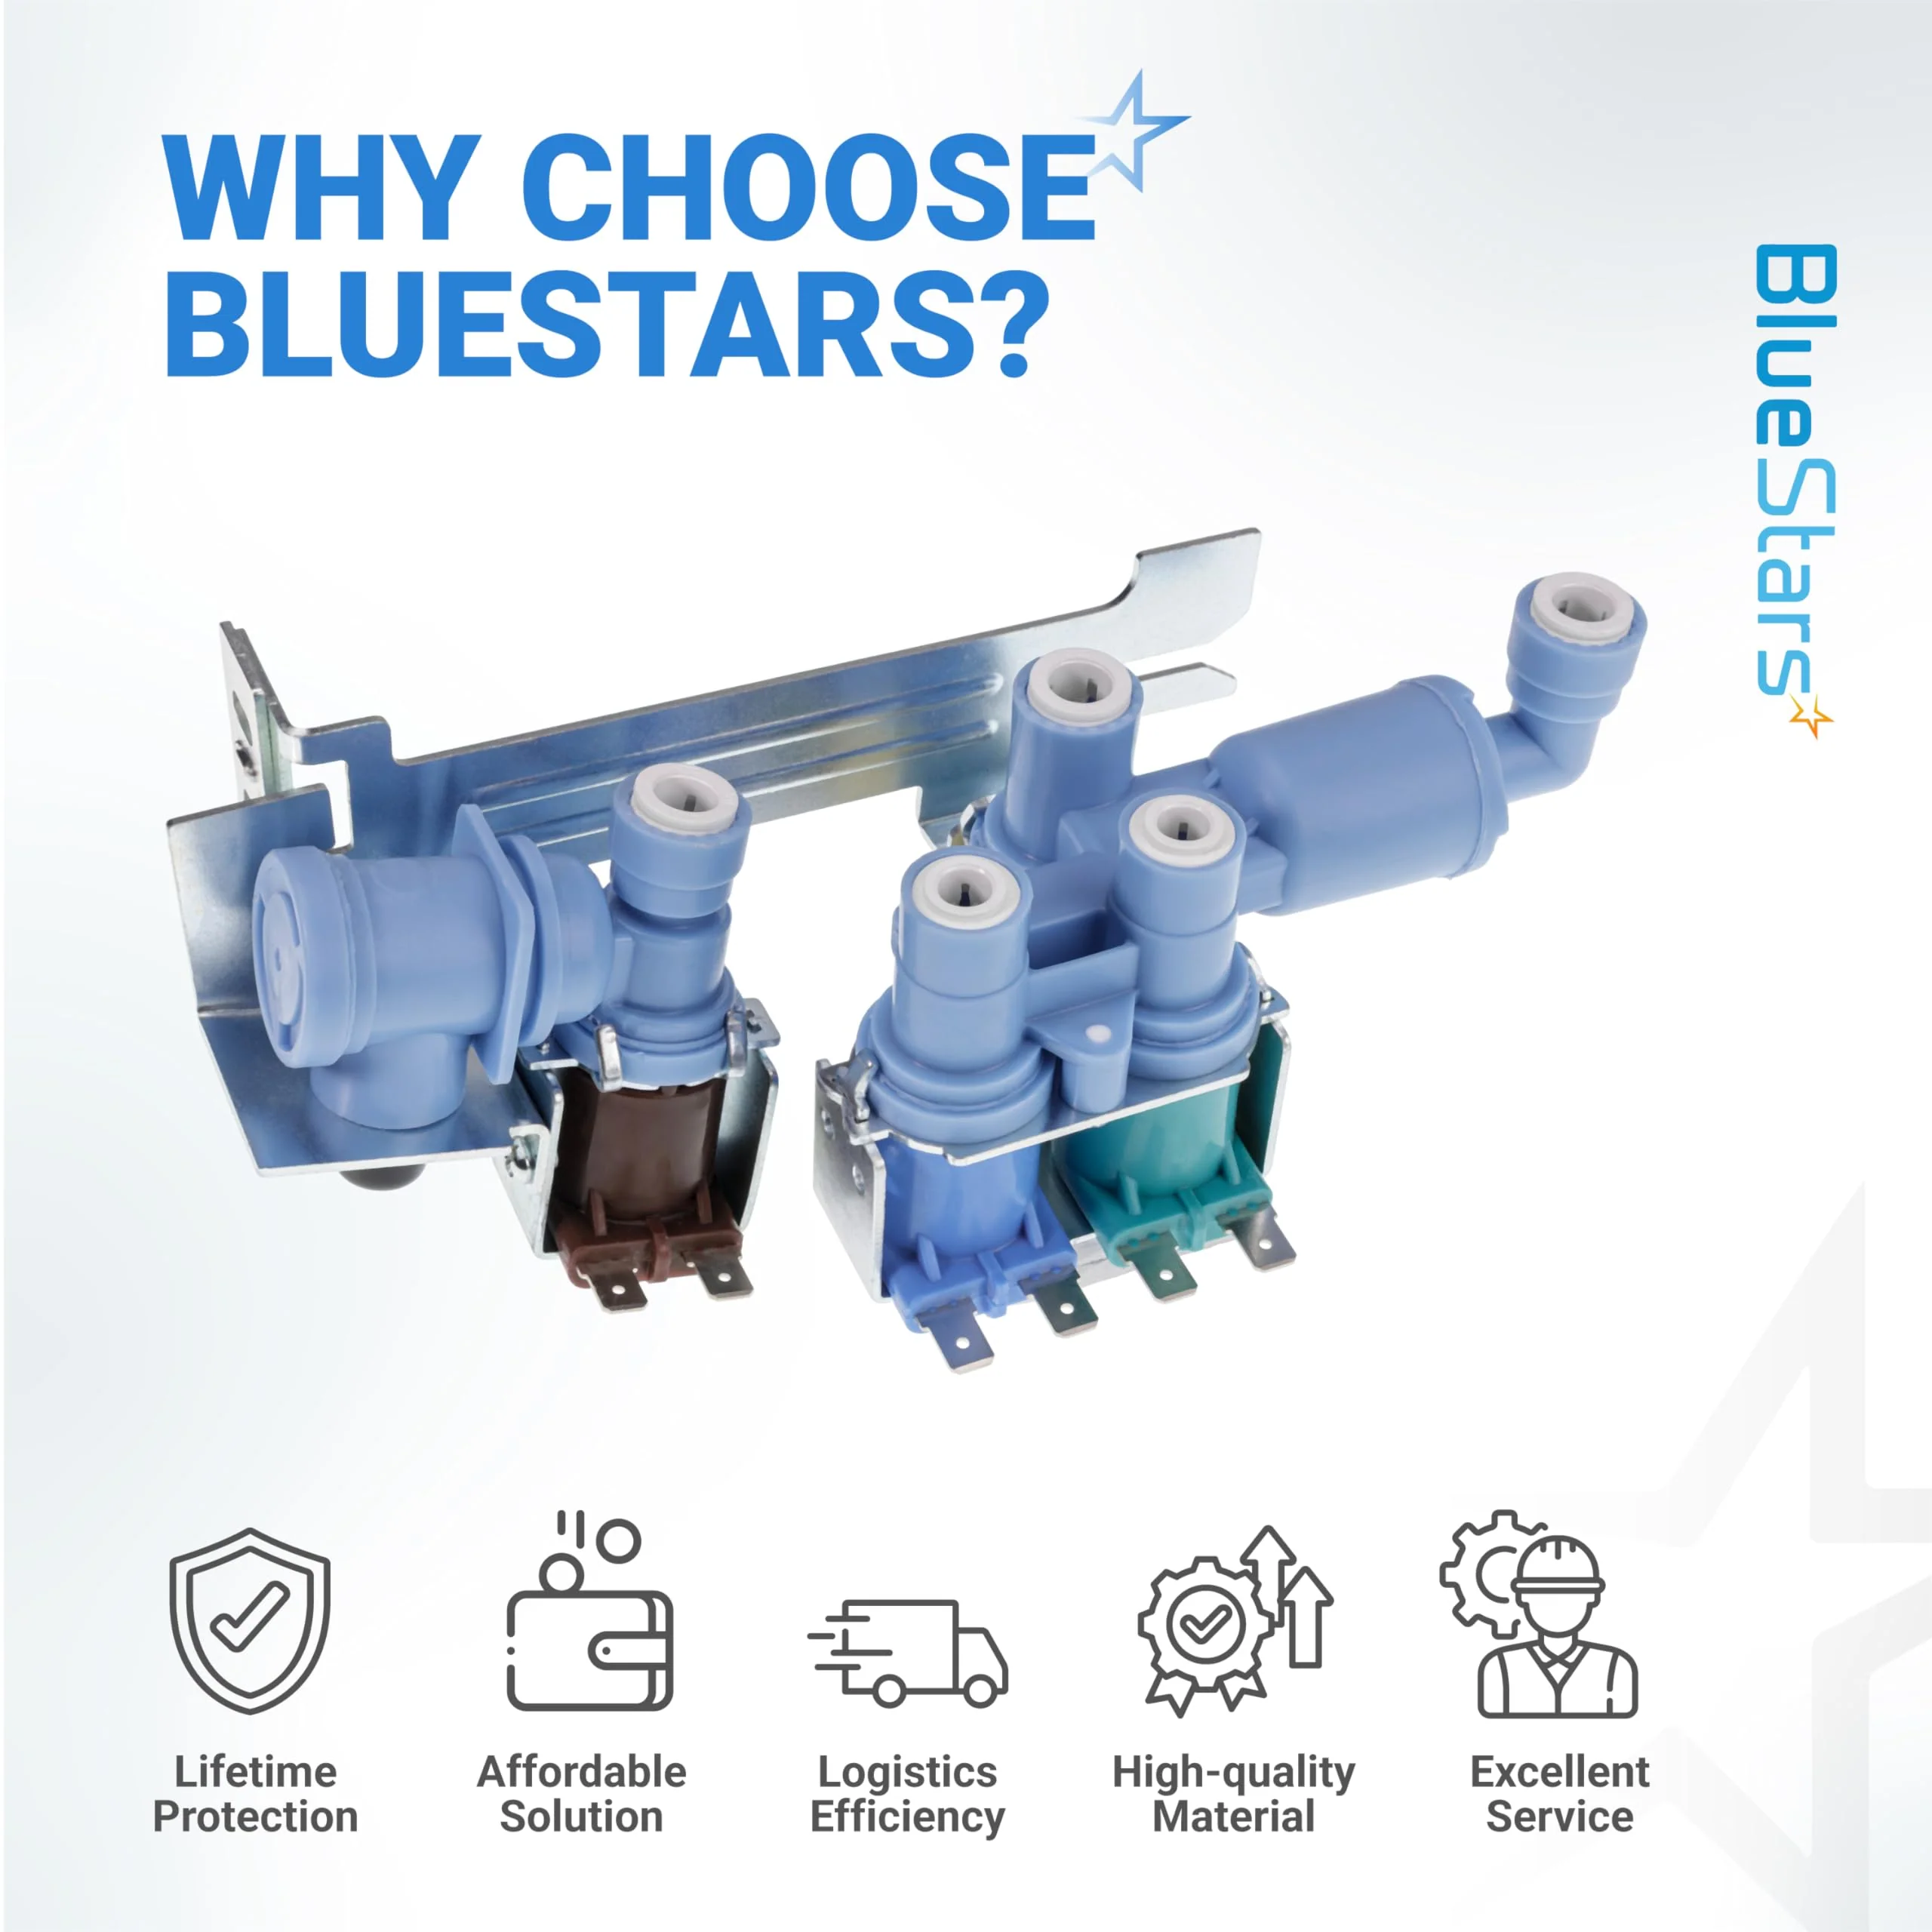
- Dual Solenoid Configuration: Features two independent electrical coils to separately control the flow of water to both the ice maker and the chilled water dispenser.
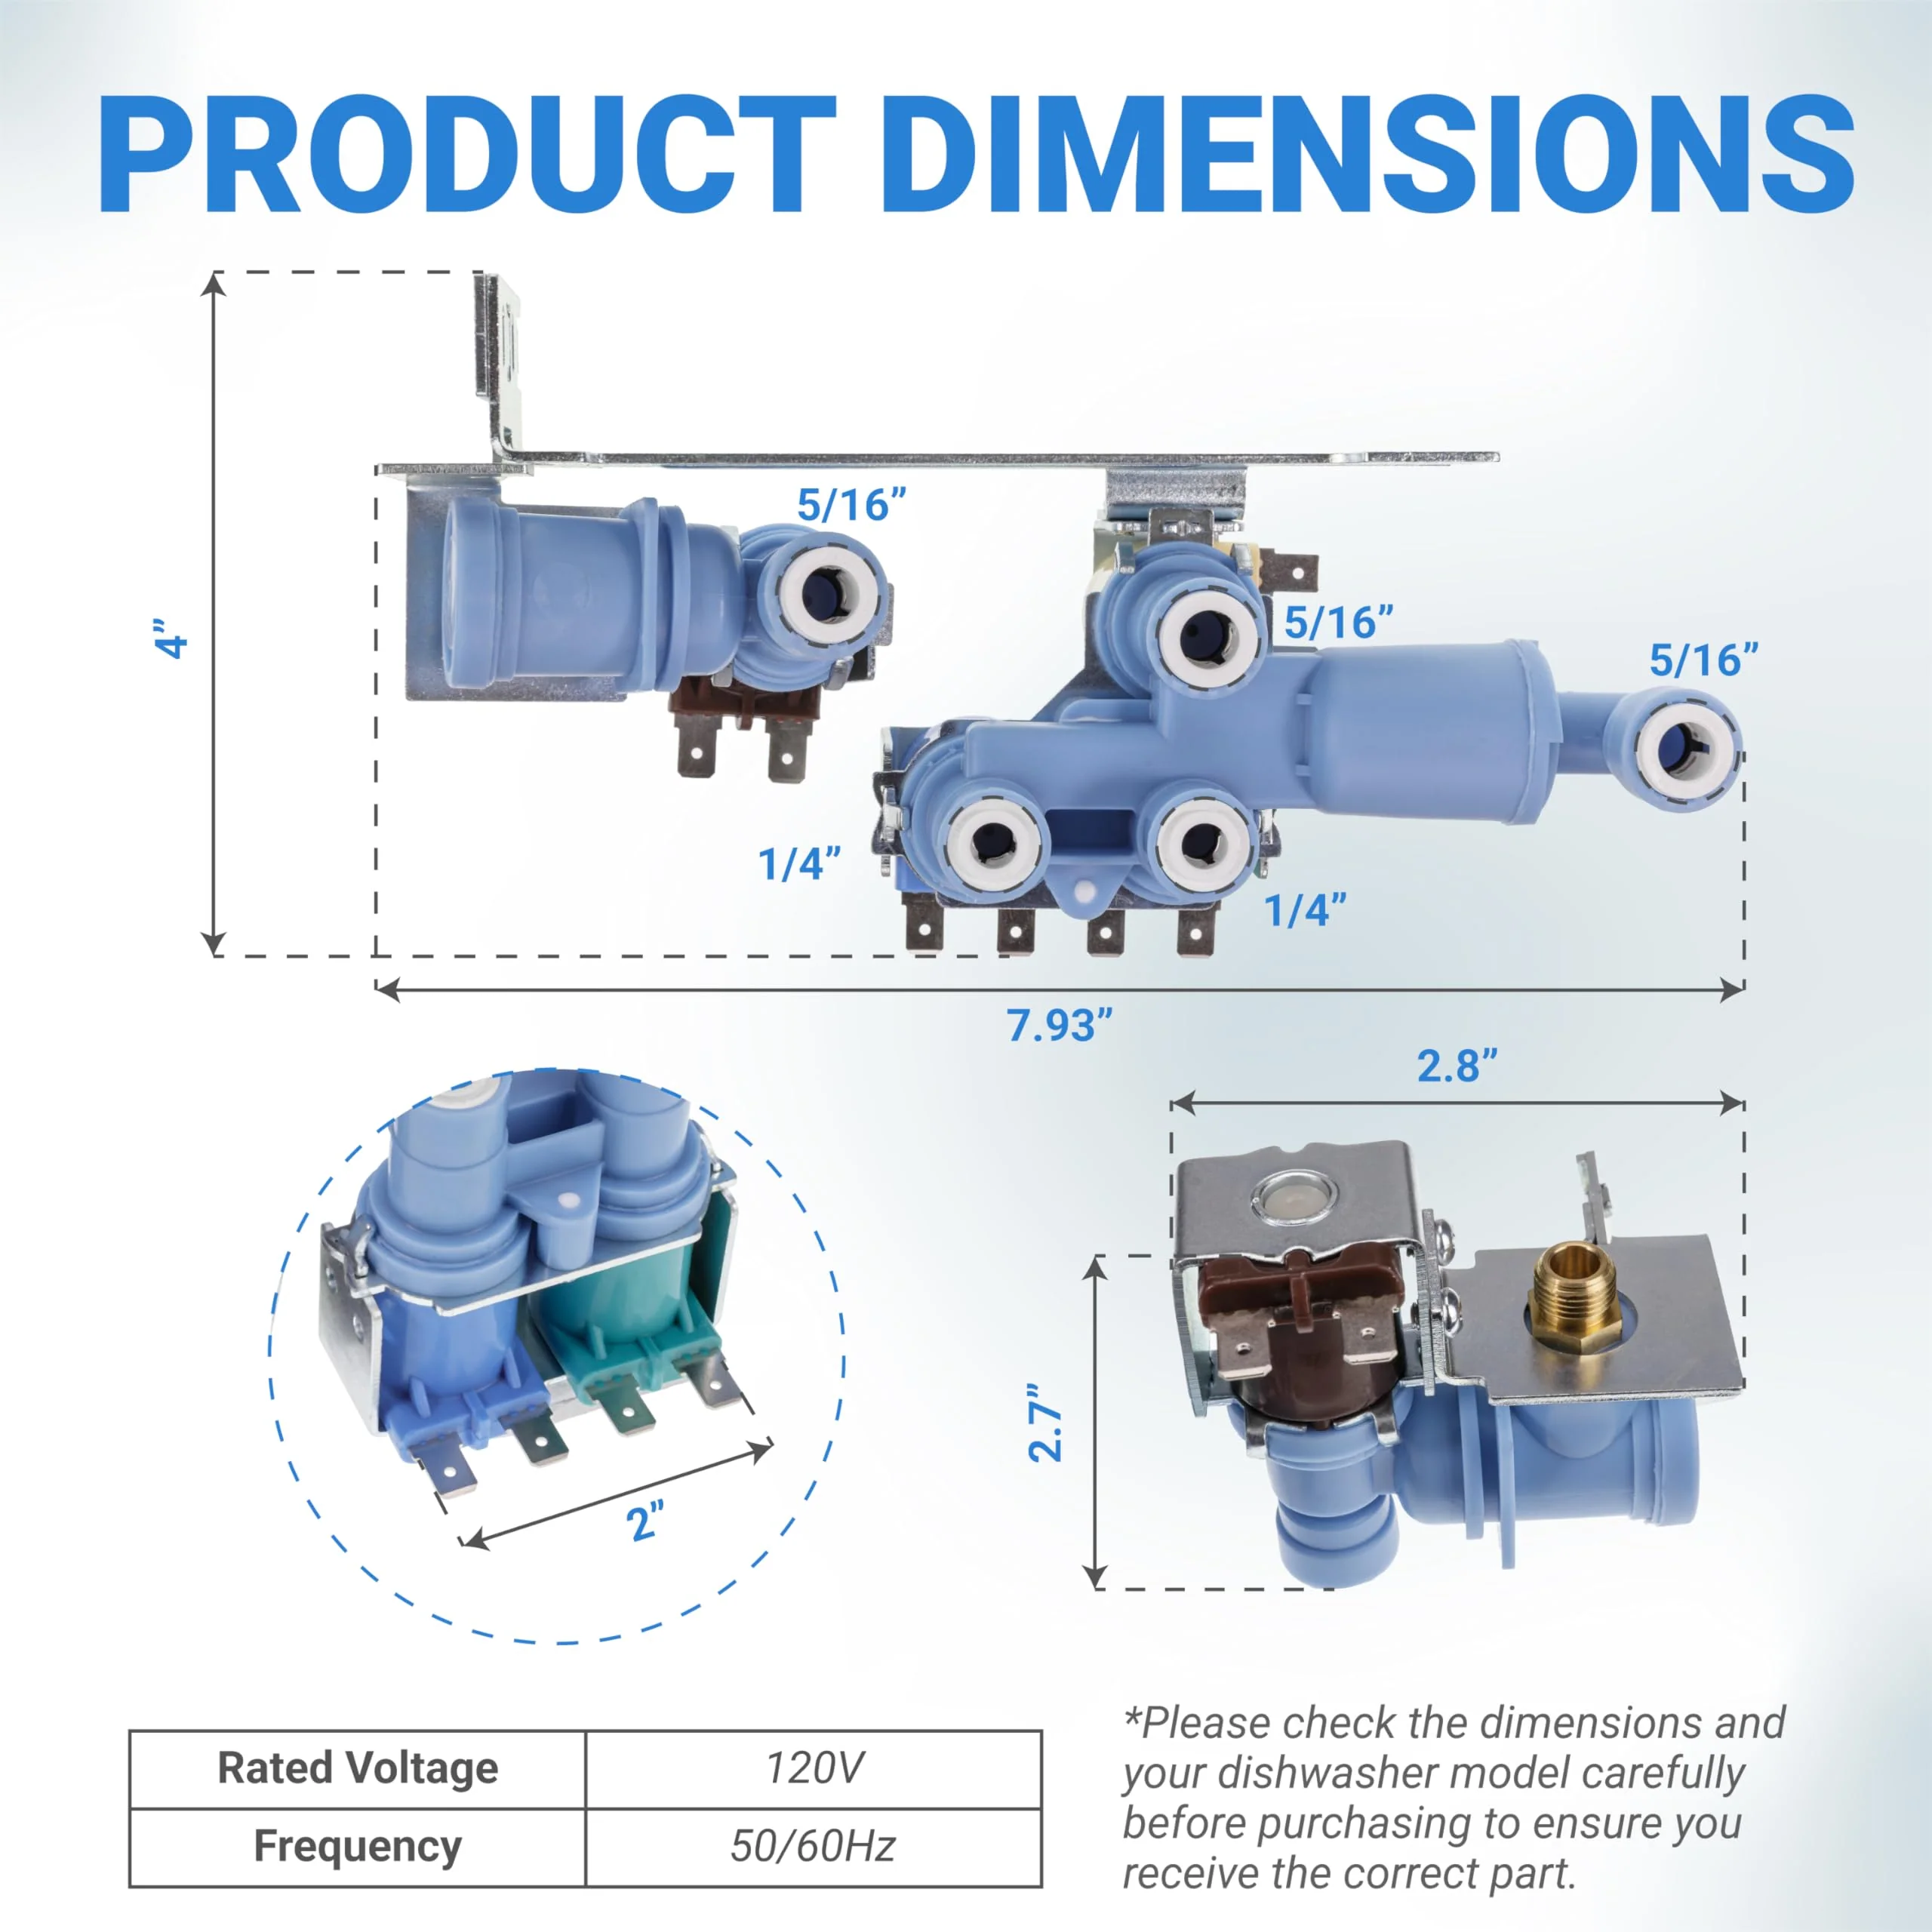
- High-Pressure Quick-Connects: Equipped with 1/4" and 5/16" push-to-connect fittings for a secure, tool-free installation of the internal plastic water lines.
- Internal Filtration Screen: Includes a fine mesh stainless steel screen at the main inlet port to prevent sediment and scale from clogging the valve or entering the ice maker.
- Precision Flow Rate: Engineered to deliver a specific volume of water during each timed fill cycle, ensuring perfectly sized ice cubes and consistent dispenser flow.
- Moisture-Resistant Housing: Constructed from durable, impact-resistant polymer designed to withstand the cold, damp environment at the rear of the refrigerator.
Replaces / Cross-Reference Part Numbers
- AP5669874
- PS7321353
- 242102201
- 2689640
- EAP7321353
- PD00007279
- WV3002
- OEM22679498
Compatibility & Fitment
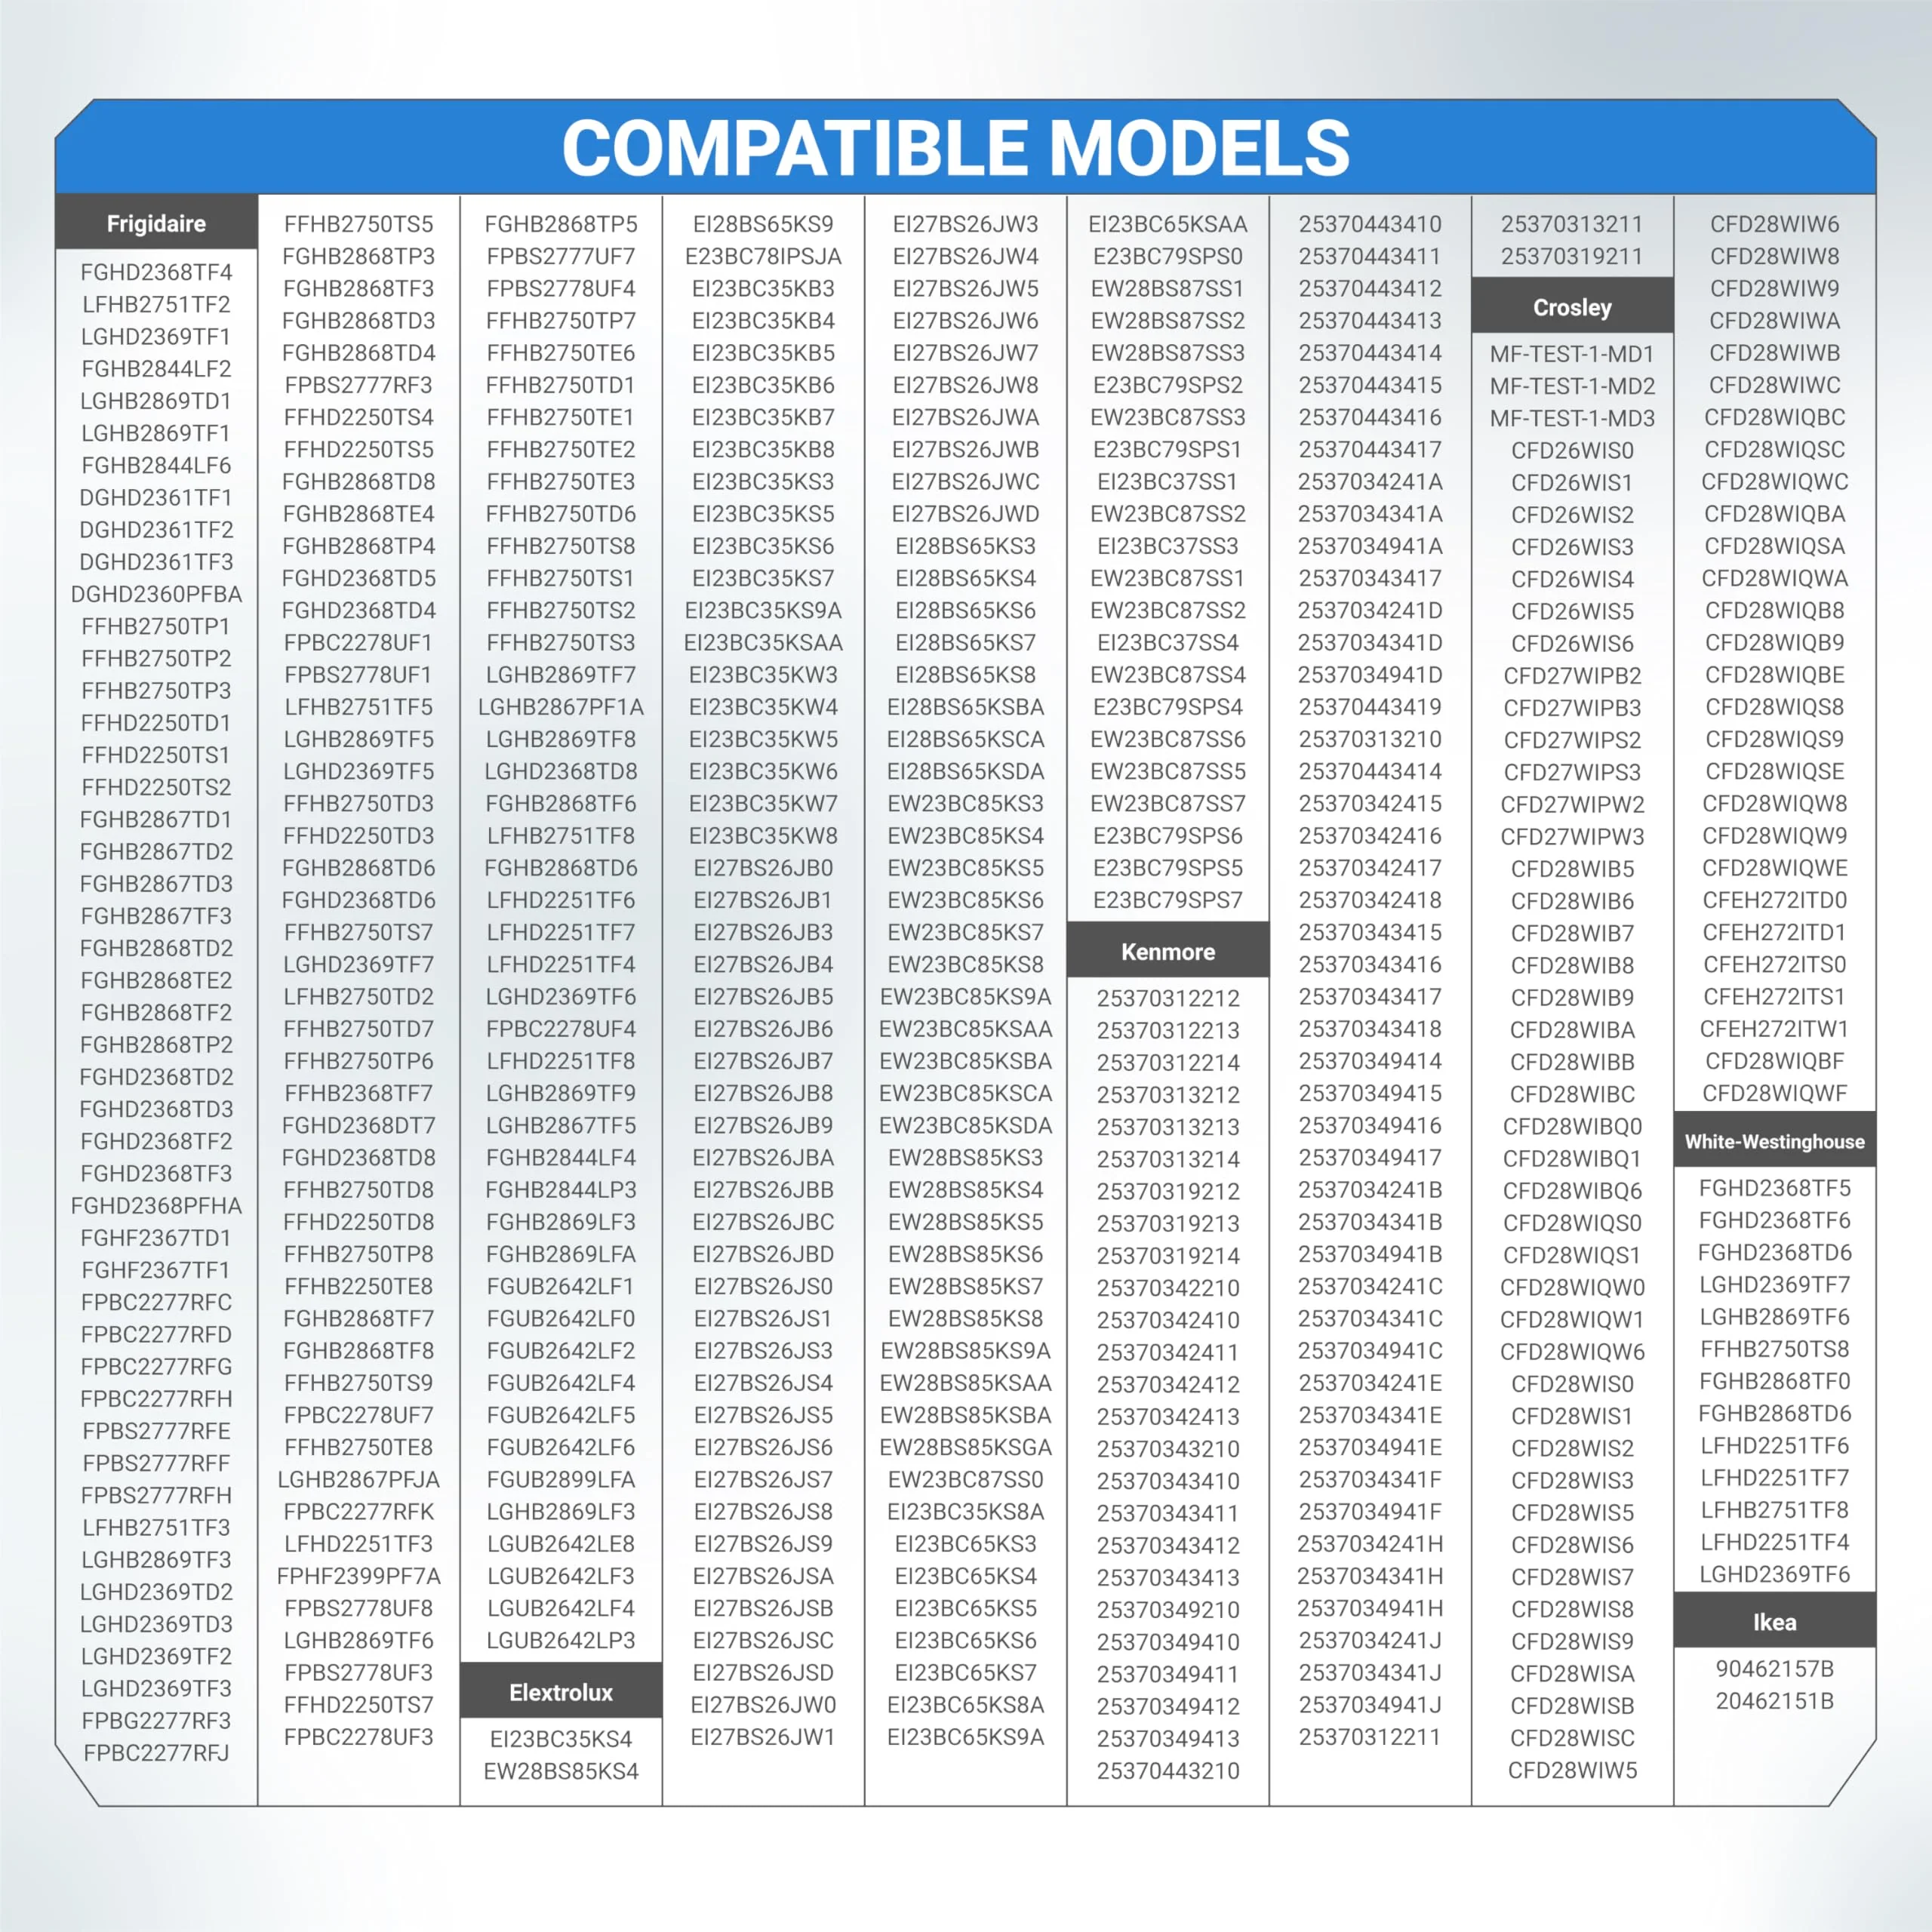
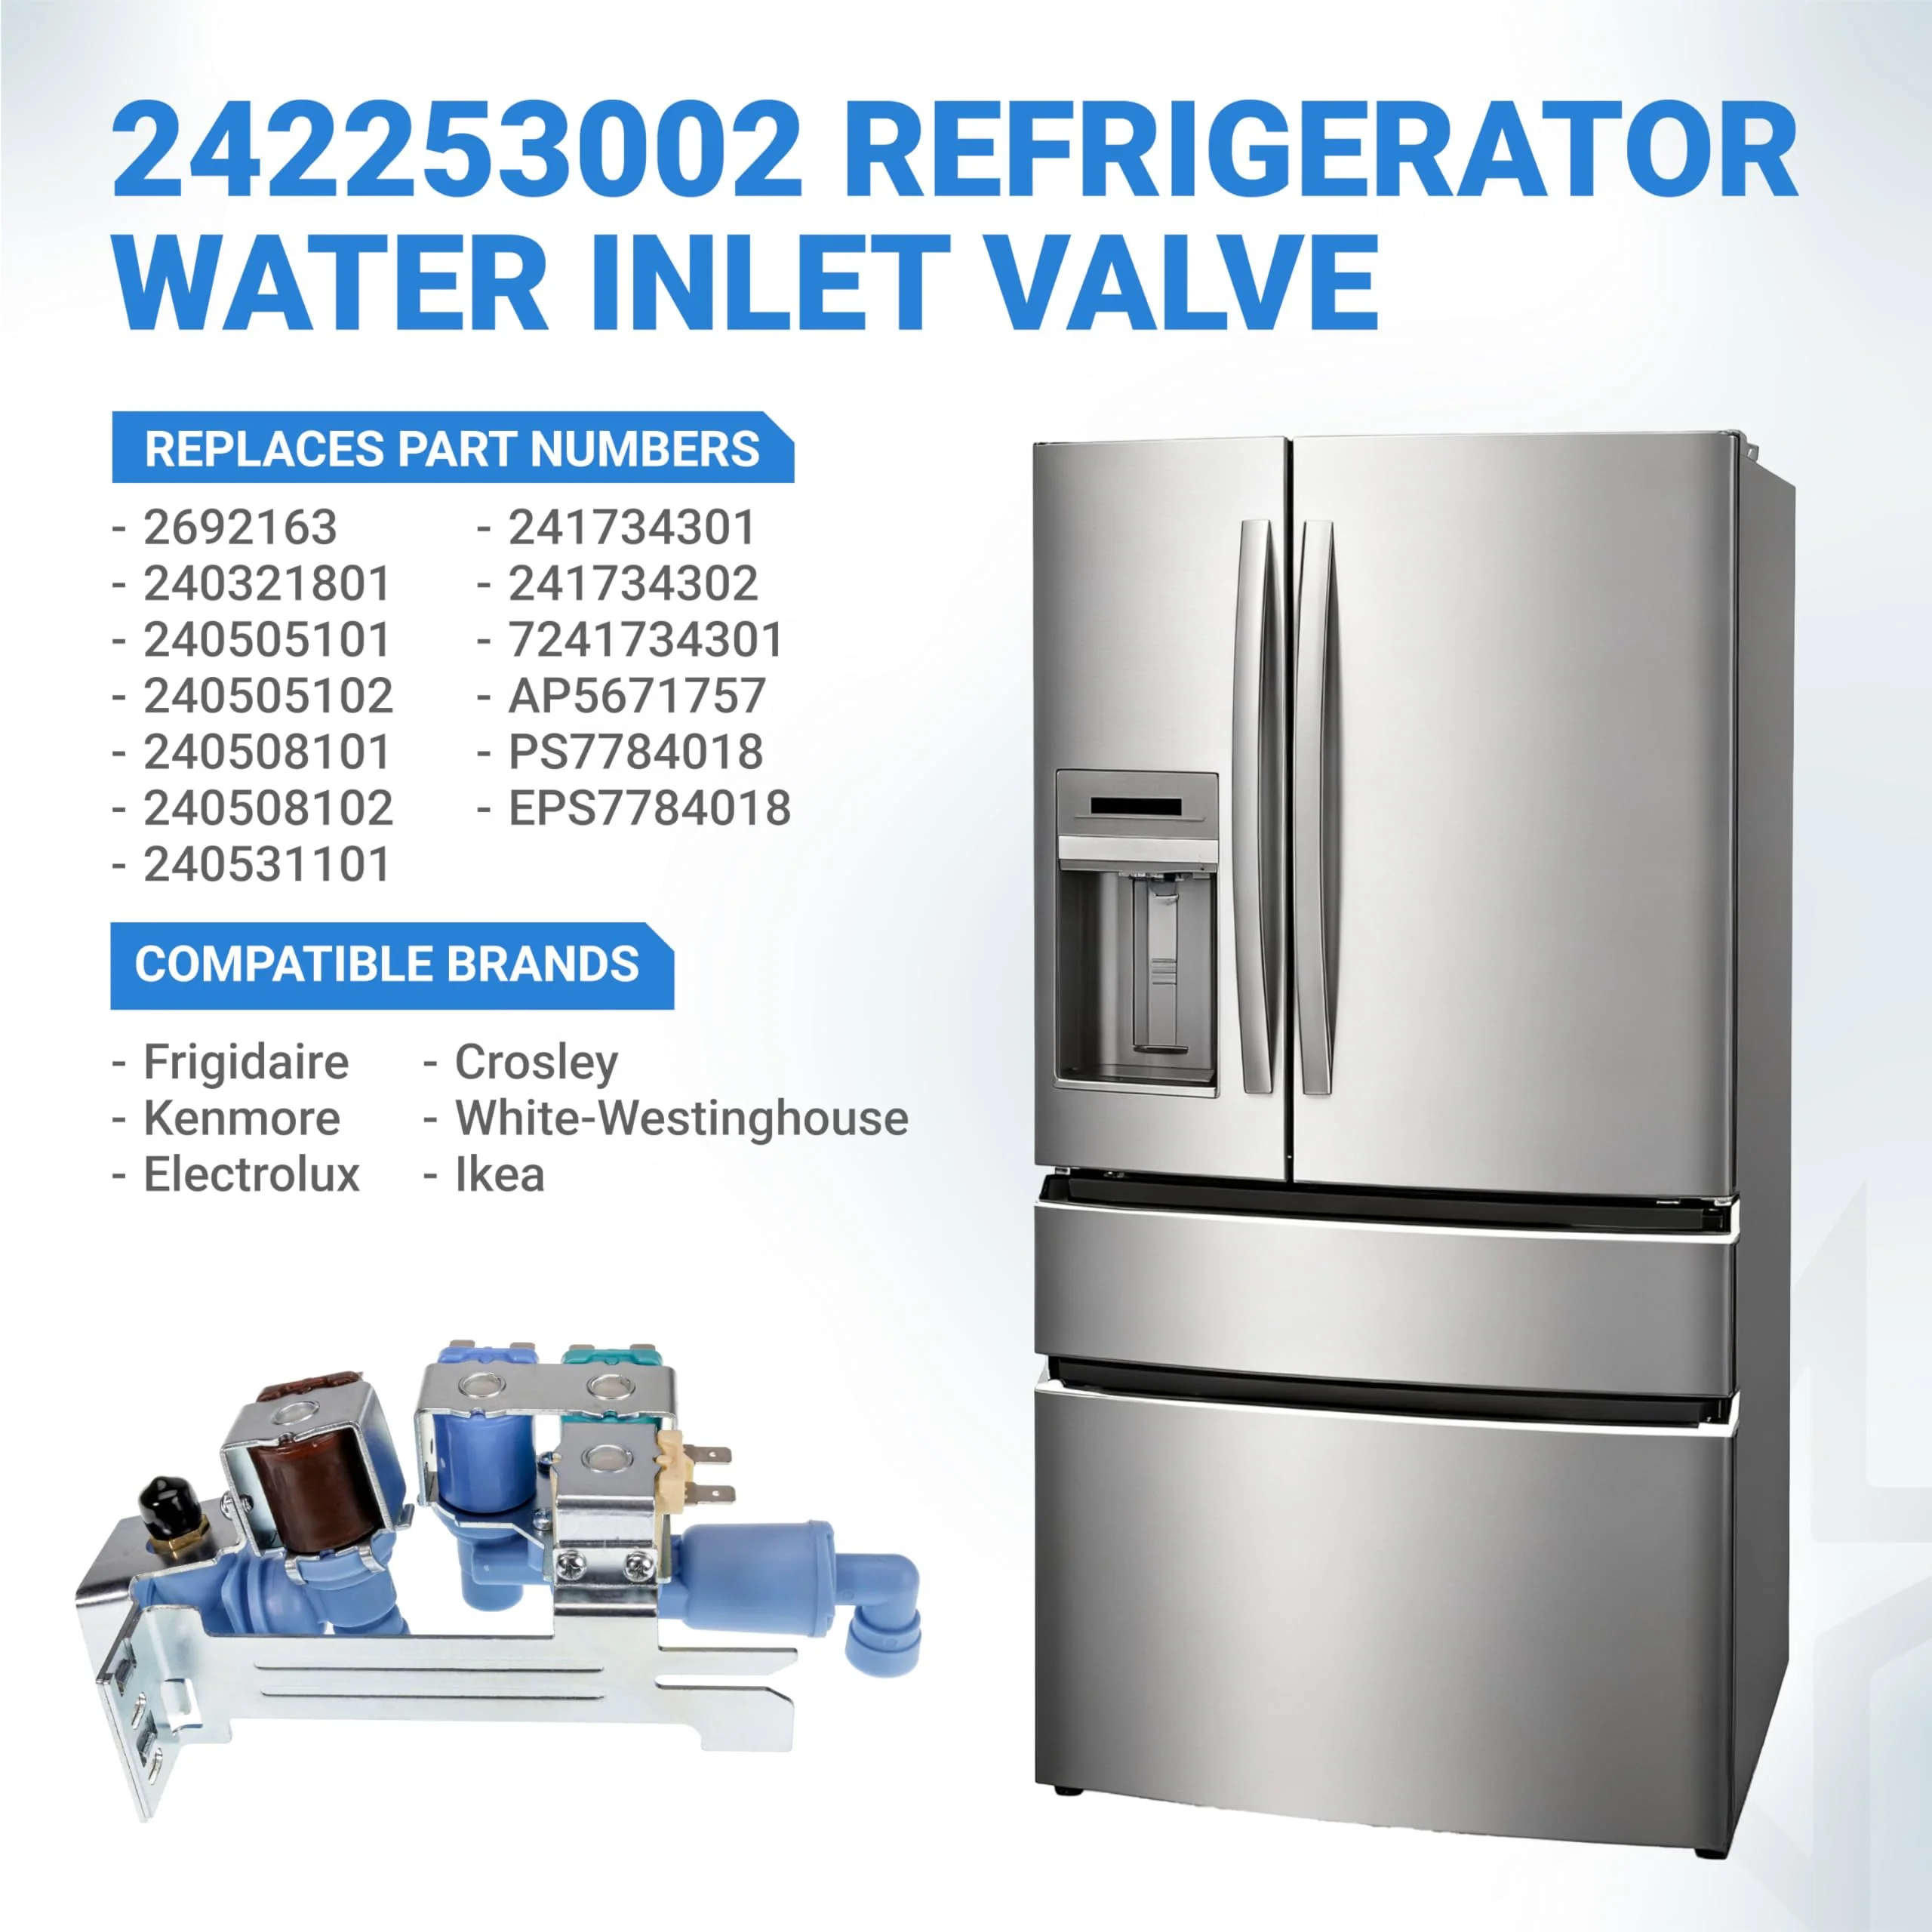
This water valve is a direct replacement for many side-by-side and French-door refrigerators manufactured by Electrolux. Key compatible brands include:
- Frigidaire: Fits models in the Gallery, Professional, and standard series (e.g., FGHS2631PF, FGHB2844LF, FFHS2311PF).
- Electrolux: Compatible with various high-end IQ-Touch and Wave-Touch models.
- Kenmore / Sears: Fits 253-series models (e.g., 253.70313211, 253.70343411).
- Crosley & Westinghouse: Compatible with select refrigerators utilizing the 24225-series dual valve.
When to Replace
- Ice Maker Not Filling: The ice maker goes through the harvest cycle, but no water enters the tray to freeze.
- Water Dispenser Not Working: You hear a "humming" or "buzzing" sound when the paddle is pressed, but no water comes out of the door.
- Continuous Leaking: Water constantly drips from the dispenser or into the ice tray, indicating the internal valve seal is stuck open.
- Leaking at the Valve Body: Visible water pooling on the floor behind the refrigerator, often caused by a cracked valve housing due to freezing or age.
- Small or Hollow Ice Cubes: Restricted water flow due to sediment buildup in the valve's inlet screen.
Installation Tips
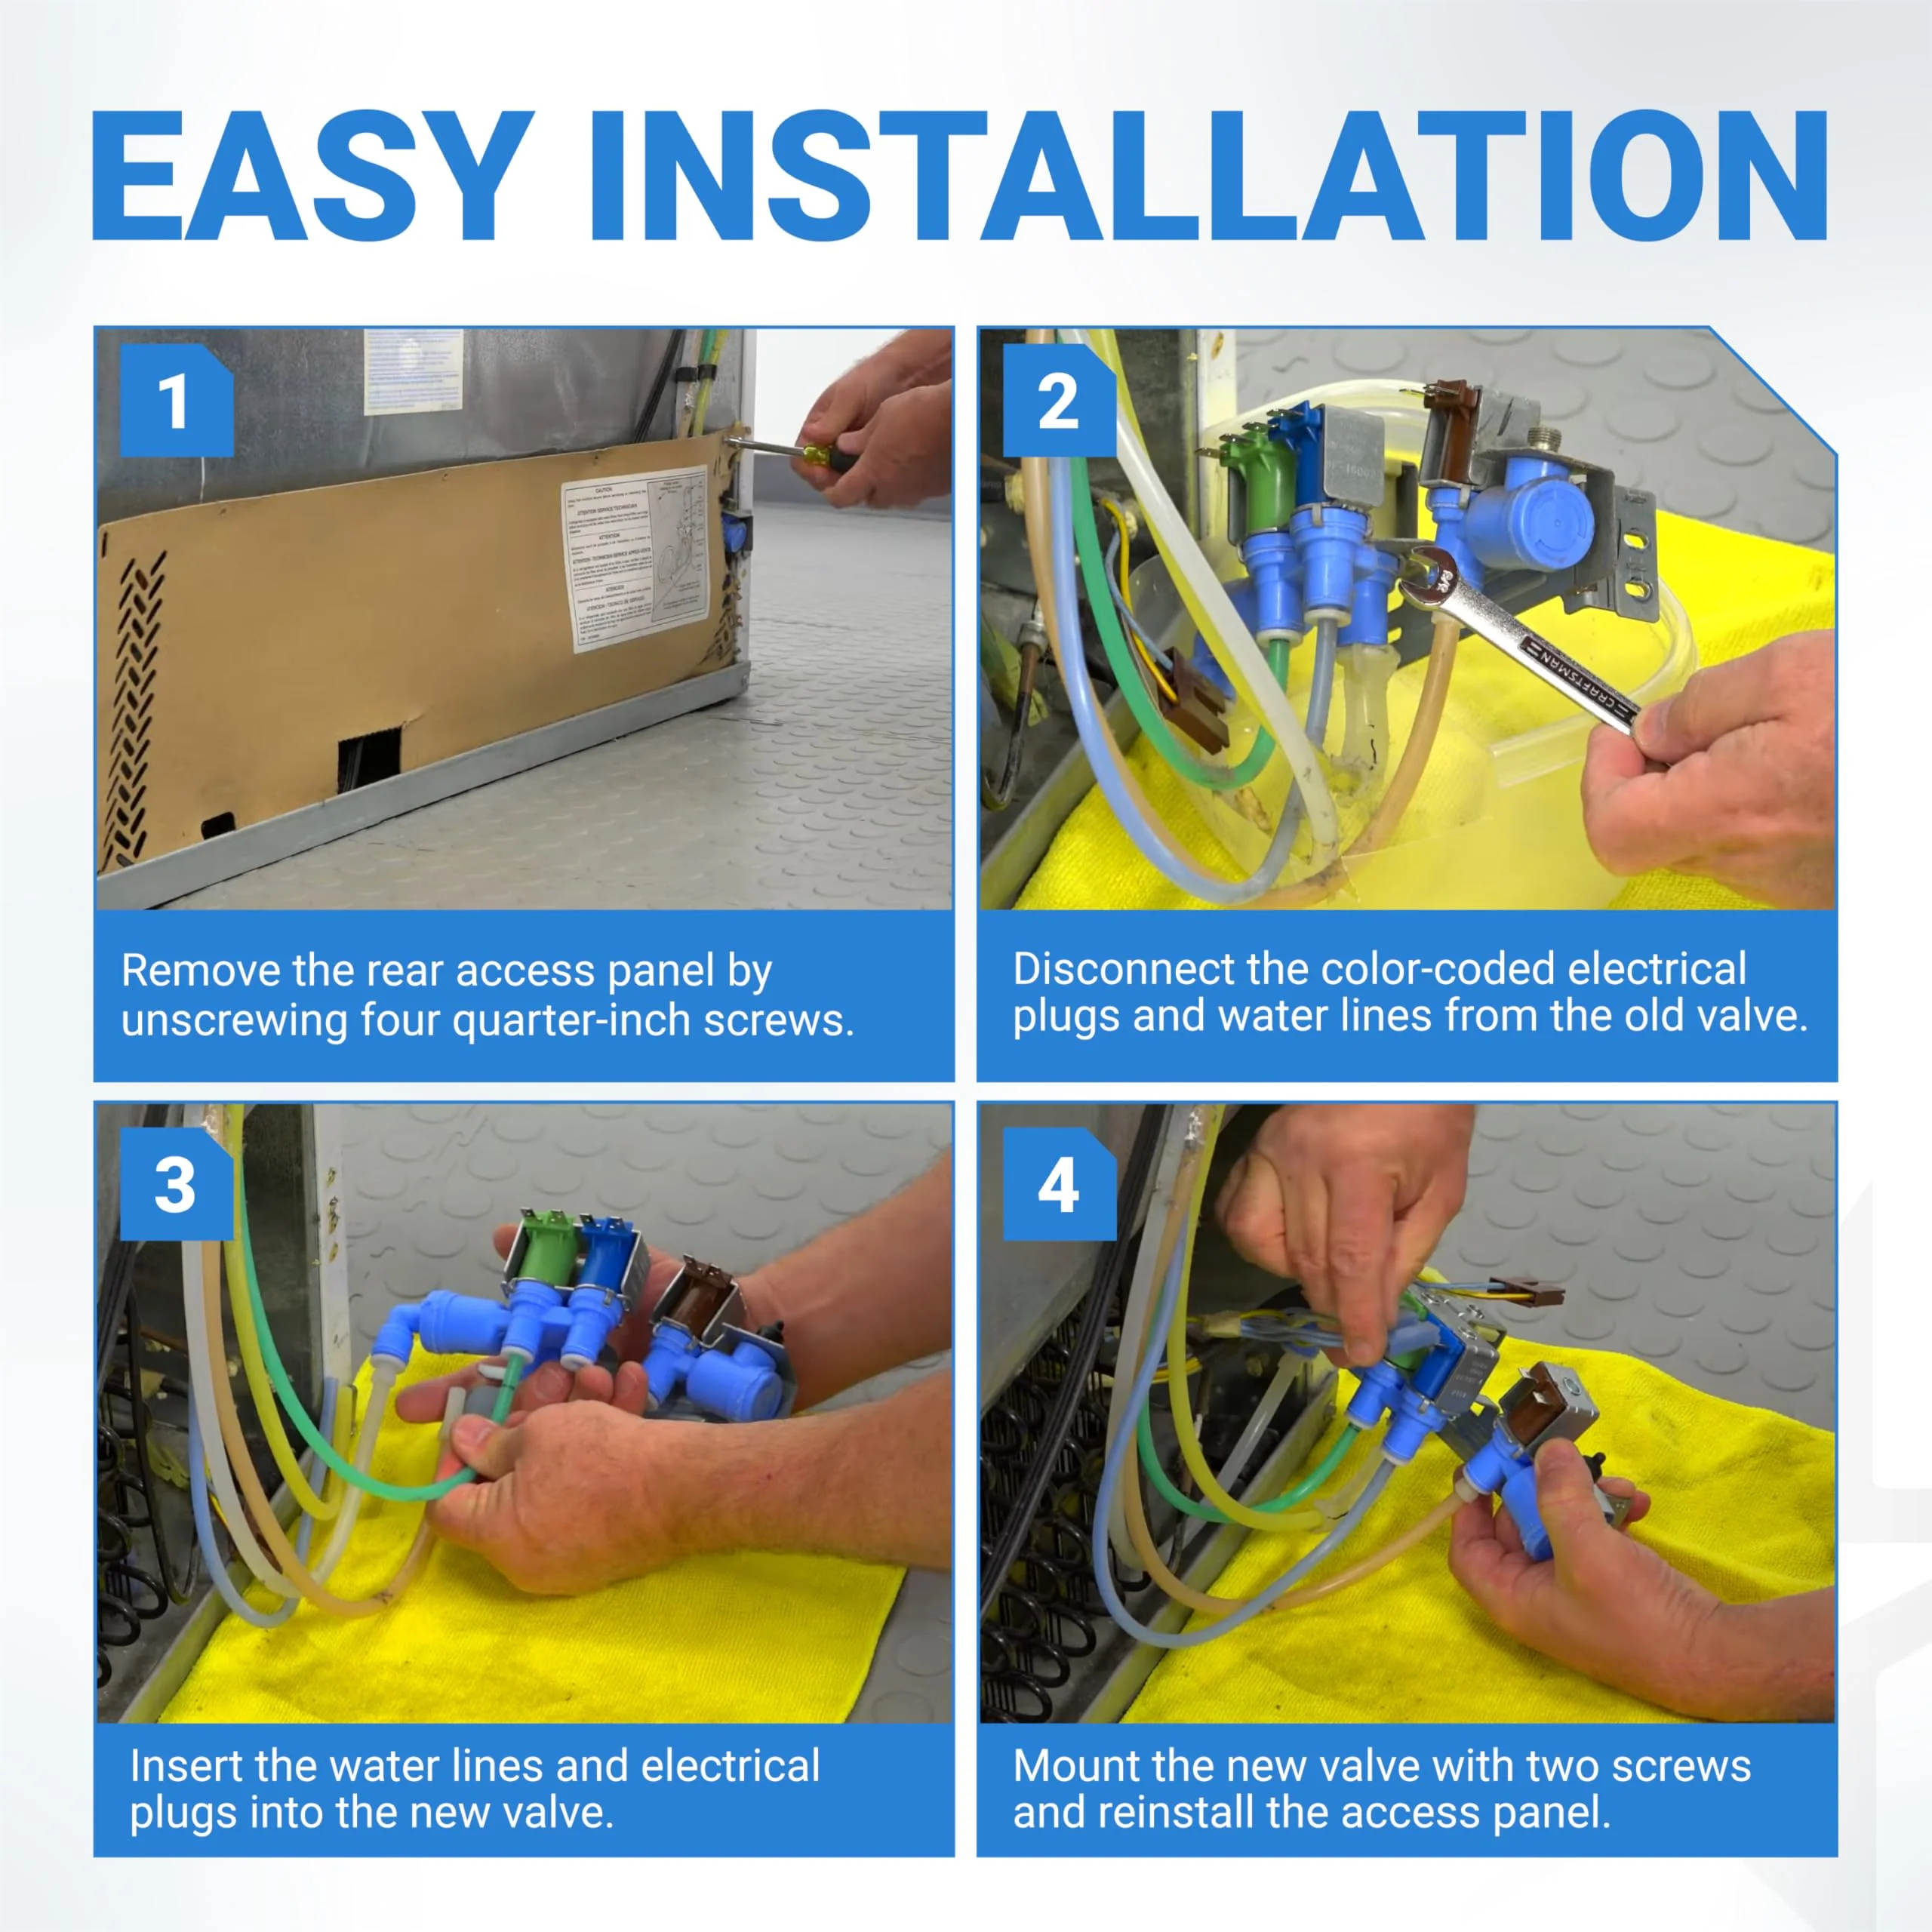
- Safety First: Unplug the refrigerator and shut off the main house water supply line before removing the old valve.
- Drain the Lines: Have a bucket and towel ready. Even with the water off, the internal lines will contain residual water that will drain when the tubes are disconnected.
- Quick-Connect Removal: To release the water lines, push the small plastic collar (ring) toward the valve body while simultaneously pulling the tube away.
- Tube Depth: When installing the new valve, push the water lines into the quick-connect ports until they "bottom out." Pull back gently to ensure the locking teeth have engaged the tube.
- Flush the System: After installation, run 2–3 gallons of water through the door dispenser to clear any air pockets or debris from the new valve.
$56.24
242253002 Refrigerator Water Inlet Valve for Frigidaire Electrolux Kenmore Crosley Refrigerators—
$56.24

Description
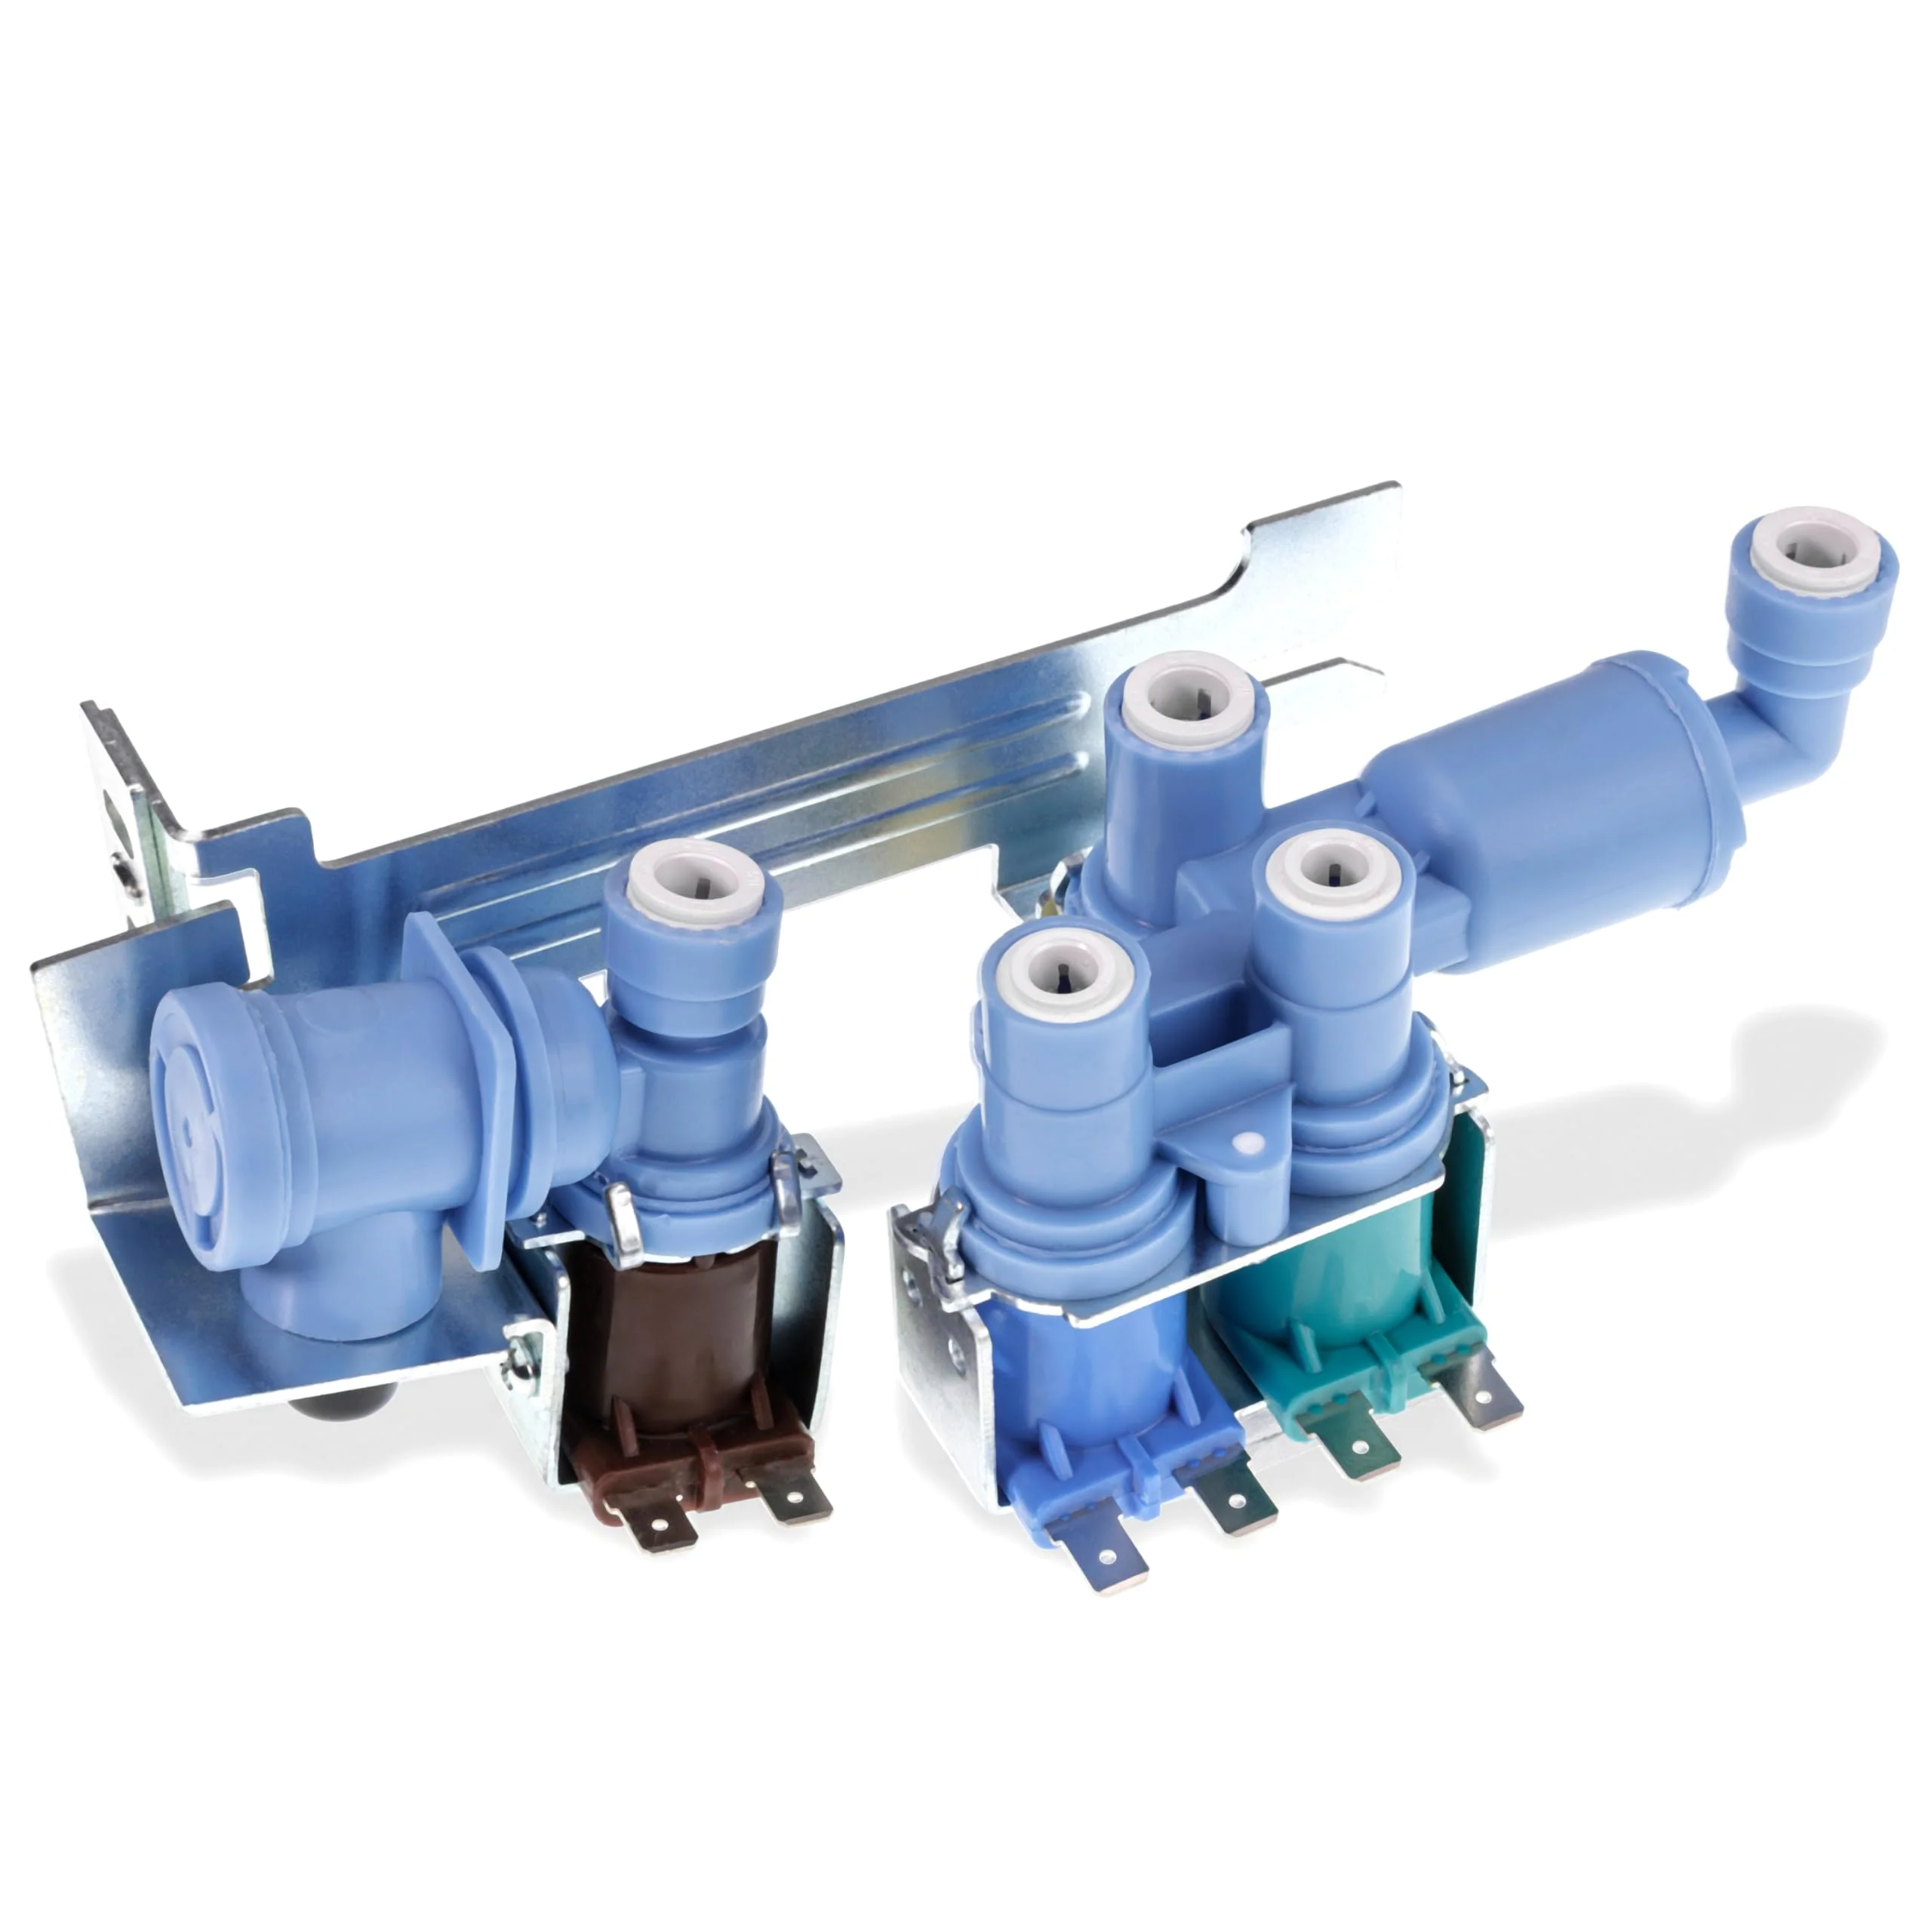
242253002 Refrigerator Water Inlet Valve
Key Features
- Dual Solenoid Configuration: Features two independent electrical coils to separately control the flow of water to both the ice maker and the chilled water dispenser.
- High-Pressure Quick-Connects: Equipped with 1/4" and 5/16" push-to-connect fittings for a secure, tool-free installation of the internal plastic water lines.
- Internal Filtration Screen: Includes a fine mesh stainless steel screen at the main inlet port to prevent sediment and scale from clogging the valve or entering the ice maker.
- Precision Flow Rate: Engineered to deliver a specific volume of water during each timed fill cycle, ensuring perfectly sized ice cubes and consistent dispenser flow.
- Moisture-Resistant Housing: Constructed from durable, impact-resistant polymer designed to withstand the cold, damp environment at the rear of the refrigerator.
Replaces / Cross-Reference Part Numbers
- AP5669874
- PS7321353
- 242102201
- 2689640
- EAP7321353
- PD00007279
- WV3002
- OEM22679498
Compatibility & Fitment
This water valve is a direct replacement for many side-by-side and French-door refrigerators manufactured by Electrolux. Key compatible brands include:
- Frigidaire: Fits models in the Gallery, Professional, and standard series (e.g., FGHS2631PF, FGHB2844LF, FFHS2311PF).
- Electrolux: Compatible with various high-end IQ-Touch and Wave-Touch models.
- Kenmore / Sears: Fits 253-series models (e.g., 253.70313211, 253.70343411).
- Crosley & Westinghouse: Compatible with select refrigerators utilizing the 24225-series dual valve.
When to Replace
- Ice Maker Not Filling: The ice maker goes through the harvest cycle, but no water enters the tray to freeze.
- Water Dispenser Not Working: You hear a "humming" or "buzzing" sound when the paddle is pressed, but no water comes out of the door.
- Continuous Leaking: Water constantly drips from the dispenser or into the ice tray, indicating the internal valve seal is stuck open.
- Leaking at the Valve Body: Visible water pooling on the floor behind the refrigerator, often caused by a cracked valve housing due to freezing or age.
- Small or Hollow Ice Cubes: Restricted water flow due to sediment buildup in the valve's inlet screen.
Installation Tips
- Safety First: Unplug the refrigerator and shut off the main house water supply line before removing the old valve.
- Drain the Lines: Have a bucket and towel ready. Even with the water off, the internal lines will contain residual water that will drain when the tubes are disconnected.
- Quick-Connect Removal: To release the water lines, push the small plastic collar (ring) toward the valve body while simultaneously pulling the tube away.
- Tube Depth: When installing the new valve, push the water lines into the quick-connect ports until they "bottom out." Pull back gently to ensure the locking teeth have engaged the tube.
- Flush the System: After installation, run 2–3 gallons of water through the door dispenser to clear any air pockets or debris from the new valve.